Gingerbread Marshmallows
Soft and squishy homemade gingerbread marshmallows. These are made with molasses (no corn syrup) and lots of spices for that perfect gingerbread flavor.

Every christmas I have to share a new marshmallow recipe, and since I’m going through a bit of a gingerbread phase this month I decided on gingerbread marshmallows! They’ll add a wonderful taste of holiday spice to any warm drink or can be simply munched on at will 😉
Recipe Origins
Earlier this year I shared my ‘best homemade marshmallow recipe which is a basic vanilla marshmallow. It isn’t new as it’s the basis for I’ve been using for about six years now to make variations: brown sugar, chocolate, mint, apple cider, pumpkin, raspberry, and peanut butter caramel. This is where I started for these gingerbread marshmallows
The recipe though is built around honey/maple syrup which are not as thick as molasses so some modifications needed to be made (I had one day of literally strings of candy ‘decorating’ my entire workspace because the recipe was too thick! It took a few days to clean it off of everything). There’s more water, a little less ‘syrup’ and because this is a gingerbread recipe and we want the spices deliciously strong, I add them after the sugar has boiled to bloom them.

Recipe Ingredients
Water: tap water, partially to bloom the gelatin and partially to boil the sugar.
Gelatin: I use powdered gelatin. These marshmallows can’t be made without gelatin.
Vanilla: pure vanilla extract.
Spices: a mix of ginger (lots of it!), cinnamon and allspice. If you prefer or want cloves, add some of that too. A ‘pumpkin spice’ mix is good here too.
Molasses: I use grandma’s molasses. No substitutes.
Sugar: fine granulated sugar.
Salt: fine sea salt.
Powdered sugar: preferably made with tapioca starch, which melts on the tongue. Cornstarch needs to be heated and can leave a ‘chalky’ aftertaste.

How to make gingerbread marshmallows
Bloom the gelatin
Combine the vanilla, water and the gelatin together in a bowl. Set it aside, it will thicken as the gelatin blooms.

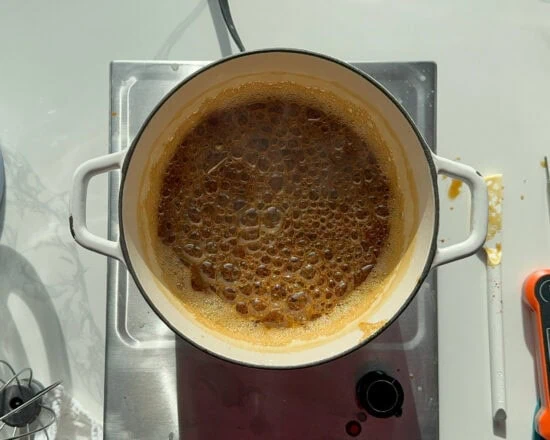
Boil the sugar
Set the sugar, salt, water and molasses in a pot and stir.

We’re going to set this over medium to high heat and cook it until it reaches the candy point: 245-250 F. Keep an eye on it either with a candy thermometer clipped to the side of the pot or by checking on it often with an instant read thermometer.

Once it reaches the right temperature, carefully (protect your hands – it is hot!) pour the boiling sugar into the bowl of a stand mixer.
Whip the Marshmallow

Add the spices and use the whisk to gently combine them – this blooms the spices.

Add the now set and solid gelatin, it will be one piece in the shape of the bowl you mixed it into.
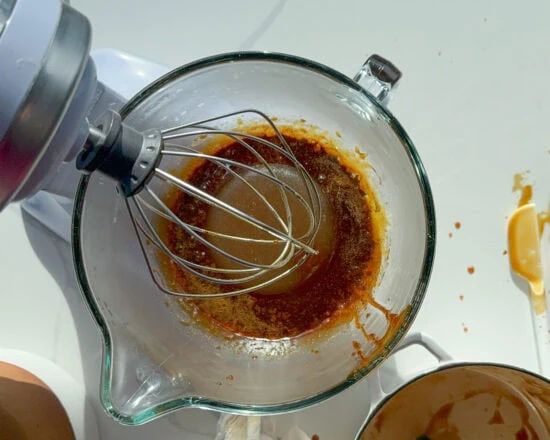
Use the whisk attachment to whip this all together: starting on low and working up to medium high speed.
The mix will be dark and liquid at first

then gradually get lighter in color and look like a foam

And eventually it will look like marshmallow fluff: thick and light colored

It is done when it starts pulling from the sides of the bowl.
Transfer the marshmallow fluff into a greased pan

Chill then Slice
Then leave it to set, for about 8 hours at room temperature or four if left to chill in the fridge.
Once the marshmallow is set, mix together the topping and sprinkle some on top of the mallow then turn it so it’s greasy side up onto a countertop.
Spread more of the powdered sugar mixture over it. Oil a chef’s knife and slice it into strips, then cubes, coating the marshmallow with the powdered sugar as you do


Once all the marshmallows are coated, they’re ready to consume, gift and keep.
Homemade Marshmallow Storage Tips
Store the mallows in an airtight container, they last about three weeks at room temperature. Rather than pack them into the container, it’s best to give them a bit of room so they aren’t squashed into an odd shape which they won’t come back from.
Gingerbread marshmallow recipe
Gingerbread Marshmallows

Ingredients
To bloom the gelatin
- 160g cool water
- 2 teaspoons pure vanilla extract
- 28g or 4 envelops powdered gelatin
For the boiled sugar mixture
- 165g cool water
- 400g granulated sugar
- 150g molasses
- 1 ½ teaspoons fine sea salt
Spice Mix
- 1 tablespoon ground ginger
- 2 teaspoons ground cinnamon
- 1 teaspoon allspice
Topping
- 65g or ½ cup powdered sugar preferably made with tapioca starch
- 1 teaspoon ground ginger
- 1 teaspoon ground cinnamon
- ½ tsp allspice
Method
- Bloom the gelatin: In a small bowl, add the cool water and vanilla and whisk to combine. Add the gelatin and whisk to dissolve. Set aside.
- Boil the sugar: in a medium to large sized pot, add the water, sugar, molasses and salt. Stir to combine. Set the pot over medium high heat. Keep a candy thermometer clipped to the pot or instant read thermometer nearby; cook the sugar until it reaches 245 F (118 C), stirring only if there are bits stuck to the edge of the pot. This can take up to 12-15 minutes and you’ll need to remove it from the heat as soon as it reaches the targeted temperature.
- Whip the mallow: use oven mitts to hold the pot and pour the boiling sugar into the bowl of a stand mixer. Immediately add the spices and affix the whisk attachment. Whisk to just dissolve the spices then add the bloomed gelatin (it will be one solid piece now) and whisk, starting at low and working up to medium high speed. The mixture will start out a dark liquid and gradually turn into a lighter foam, then around the 10-15 minute mark, will turn into a light colored marshmallow fluff. If the spices are gathering at the sides of the bowl (you can usually see it if your mixer bowl is glass), stop the mixer and scrape the sides then continue whisking. Once the marshmallow fluff is light colored, thick and is pulling away from the sides of the bowl around the whisk, stop mixing.
- Oil a 9x9 square cake pan (for thinner marshmallows use a 13x9 cake pan) and transfer the marshmallow fluff into the pan. Smooth over the top so it’s all in one even layer.
- Cover the top with foil and set aside for 8 hours at room temperature (you can chill it in the fridge if you’d like it to set quicker).
- Once the marshmallow is firm, slice and coat: in a small bowl whisk together the topping (sugar and spices). Spread some of the mixture over the top of the mallow then invert it onto the counter (so the oiled side is face up). Spread more of the topping all over the marshmallow. Slice into ½-1 inch cubes, dipping each marshmallow in the spiced sugar. I find rubbing them together in the sugar helps dust off the excess.
- Set the marshmallows in an airtight container to store. They keep for about 3 weeks~!
Did you make this recipe?
Share & tag me on instagram @buttermilkbysam


I tried this yesterday but my gelatin didn’t bloom and so I didnt want the syrup to go to waste so I added eggs, milk, flour and baked a cake with it! Delicious and had a banana bread texture.
I tried the marshmallows again tonight at first added my gelatin and it wasn’t whipping right even after 30 minutes so I heated the whole thing up again (but now it burnt a bit because once you reheat up to the 118⁰C the different sugar crystals will get too hot I think… I made this exact mistake reheating caramels) but still used it and actually got it to the marshmallow stage!
Anyways I was super happy to see it fluff up after spending so long on it even if it tastes like burnt lol! I’ll totally try out the other marshmallow recipes on your page!
Perfectly spiced and delicious in hot cocoa! Or nice and spicy eaten on their own. Will be adding these to our marshmallow rotation!