Brown Butter Pumpkin Cinnamon Rolls
Wonderfully gooey and soft pumpkin cinnamon rolls made with pumpkin puree and lots of pumpkin spice. Browned butter goes into the dough, filling and in the icing for an extra boost of flavor.

Around three years ago I shared a small batch cinnamon roll recipe and within the post I added a pumpkin cinnamon roll recipe variation. This recipe here is more or less based on that with some marked changes: it’s larger so it makes a full batch of 12 rolls and I skip the tangzhong method for it as during the recipe development process I found it unnecessary.
After testing the recipe I found I liked greek yogurt in the dough more than the sour cream. Yogurt gave the dough a much softer and tender outcome. Early on I was skipping the heavy cream bath but noticed all the difference once I did add it (the gooeyness is unmatched) so that is a must. You’ll note there is no egg in this recipe, I found the dough did not need it and was actually softer without the added protein.
Also, very importantly (!) there is so much brown butter in these rolls: it’s in the dough, it’s in the filling and it’s in the glaze. You’ll find these are a very close match to these popular brown butter cinnamon rolls (albeit with lots of pumpkin and pumpkin spices!).

Recipe Ingredients
Yeast: active dry yeast or quick rise/instant yeast.
Water: tap water warmed to touch.
Flour: all purpose flour of a medium to high protein content. Bread flour works too though it may make for a slightly tougher roll.
Pumpkin puree: canned (I use Libby’s) or homemade (more on this below!). Make sure it’s 100% pumpkin, without any other ingredients. Some cans are pumpkin pie filling which have added sugars and spices.
Pumpkin spice: a mix of cinnamon, nutmeg, ginger, cloves and sometimes allspice. If you prefer, you can just use cinnamon.
Greek yogurt: I used full fat but any fat content should work. Stir the yogurt so you get a good mix of the thick and watery parts.
Brown sugar: light or dark. Some will go into the dough and some for the filling. You can sub granulated sugar in the dough if you like but use brown sugar for the filling.
Vanilla: pure vanilla extract or vanilla bean paste.
Salt: fine sea salt.
Heavy Cream: for the ‘bath’ the rolls will be baked in. This makes them extra gooey (thank you to Lizzy T for this tip!). Whole milk does not work as a substitute here.
Powdered sugar: for the glaze. I find powdered sugar made with tapioca starch (not cornstarch) is better for uncooked applications.

Browning the butter for brown butter pumpkin cinnamon rolls
We’re going to start with a full cup or 226g (two sticks) of butter. As butter browns its water evaporates and the composition of the butter changes. After browning you’ll have roughly 180-190g of a mixture of browned milk solids (the brown bits) and yellow liquid.
I’ll ask you to separate this into three bowls; one for the dough (57g), one for the filling (about 113g) and then just some brown butter bits that will go into the glaze (about a tablespoon).
You can do this part beforehand but you’ll want it cool but not solid when added to the recipe.
Make your own pumpkin puree
In one of the recipe tests for these, I used homemade pumpkin puree and I LOVED the result. To be honest, it was better than the batch I made with canned pumpkin (no other changes). Here’s how to make your own pumpkin puree:
You need a fresh ‘pie pumpkin’ or ‘sugar pumpkin’: tug the stem off and use a chef’s knife to slice it in half from the top to the bottom (vertically if the pumpkin is standing up).
Pull or carve out the stringy bits and seeds in the center, I use a metal spoon and scrape against the inside walls to get as much string out as I can (you can wash and roast the seeds if you like).
Place the two halves face down onto a baking sheet lined with parchment paper and roast in an oven preheated to 400 F, until soft – about 35-45 minutes. Scrape the soft flesh out and blend it until smooth. Now you have pumpkin puree!
How to make Pumpkin Cinnamon Rolls
Brown the butter: set the butter all together in a light colored pan and cook until brown bits gather at the bottom (details on this below). Never leave the butter in the pan or it will continue to cook and will burn.
Separate the butter for the three areas we’ll add it to: the dough, the filling and the glaze.
Making the pumpkin cinnamon roll dough
Bloom the yeast: set the warm water, yeast and a pinch of the sugar for the dough in the bowl of a stand mixer. Leave it for a few minutes, it should turn foamy to indicate it’s good to use.


To the bowl add the remaining dough ingredients, except the butter.

Knead on medium speed until the dough comes around the dough hook and clears the sides of the bowl.
Then add the butter and knead again until it clears the bowl and forms a ball shape around the hook.

Knead on the counter briefly then transfer to a greased bowl.

Dough’s first rise
Can be on the counter, at room temperature or in the refrigerator (though give it 1-2 hours at room temperature first) overnight.
How to tell when the dough is done rising
A recipe will always give you an estimate for rising times but you should not always follow them. The temperature in the kitchen, if the dough is placed in a warm spot or somewhere cooler, will change the rising times. It’s important to look for visual cues.
The first rise is complete when the dough has nearly doubled in size. The poke test works for the first rise too: insert your finger into the dough and if it springs back immediately, the yeast is still working. If it leaves an indentation and slowly springs back, it’s ready.
It should feel soft and malleable in your hands, and be easy to roll. If it’s pulling back, that’s usually a sign the dough is underproofed.

Filling and Shaping the Rolls
On a floured surface, use a rolling pin to roll the dough into a large 14 x 12 inch rectangle.

The filling: stir together the sugar, spice and salt. Spread the softened butter (melted butter is ok too) over the rolled out dough then sprinkle the sugar mixture on top.

Use your hand to spread the sugar into an even layer.
Roll up the dough from the long side so you have a long log, seam side down.
Slice the dough into rolls using a sharp knife like a bread knife that are about an inch thick. Unwaxed, unflavored dental floss works great here too.
Arrange them in a greased pan so they have room to grow:

Dough’s second rise: should be at room temperature, covered. You’ll know they’re ready to bake when you poke the side of a roll and it leaves an indentation. If it springs back immediately the dough needs longer to rise.

The heavy cream bath & baking the rolls: pour the heavy cream in between the rolls. As the rolls bake they will absorb the cream and become softer and the filling gooey.

Making the glaze: whisk all the ingredients together. Tip: if using the cream cheese, whisk it into the cream/milk and browned butter before adding the sugar.
When should you glaze cinnamon rolls?
This depends on how you like the icing to sit on the rolls; do you prefer it as a thin layer covering all of the roll and seeping into the layers? Then glaze them while they are hot or still pretty warm.
If you prefer to have a thick layer of glaze on top like a frosting, wait until the rolls are completely cool so the glaze doesn’t melt down over them.
Storing the rolls
Cover the tray of rolls with foil and secure tightly. I leave mine at room temperature overnight. They will become softer if heated briefly; 10 minutes in a 200 F preheated oven or in the microwave.
Overnight Pumpkin Cinnamon Rolls
The dough can be made the day before and have a first rise in the fridge: I like to leave it at room temperature for at least an hour (but up to 2, especially if the kitchen is on the cooler side) and then set it in the fridge overnight.
In the morning, the dough will be soft and easy to roll out. Your second rise will be slightly longer as the dough will first need to come to room temperature, then to have it’s second rise. Always look for visual cues to know when the dough is ready: a poke test to the dough should keep an indentation, not bounce back immediately.
Brown Butter Pumpkin Cinnamon Rolls Recipe
Brown Butter Pumpkin Cinnamon Rolls

Ingredients
Brown Butter
- 226g or 1 cup unsalted butter cold is fine
Pumpkin Dough
- 7g or 2 ¼ teaspoons instant or quick rise yeast active dry works too
- 60g or ¼ cups warm water
- 520g or 4 cups all purpose flour
- 190g or ¾ cup pumpkin puree
- 120g or ½ cup greek yogurt
- 100g or ½ cup brown sugar
- ½ tsp fine sea salt
- 1 teaspoon pure vanilla extract
- 57 or ¼ cup browned butter from above
Pumpkin Spice Filling
- 113g or ½ cup browned butter from above
- 150g or ¾ cup brown sugar
- 1-2 tablespoons pumpkin pie spice depending on preference
- ¼ teaspoon fine sea salt
- 120g or ½ cup heavy cream for bath
Brown Butter Icing
- 190g or 1 ½ cups powdered sugar
- 1 tablespoon vanilla bean paste or 2 teaspoons pure vanilla extract
- Pinch fine sea salt
- 2-4 tablespoons heavy cream or milk
- 1-2 tablespoons browned butter from above, mostly brown bits
- ¼ cup whipped cream cheese if you use non-whipped you’ll need to wait until it warms to room temperature so it’s easier to mix into the glaze (optional)
Method
- Brown the butter: set the butter in a light colored frying pan over medium heat. Cook as the butter melts and begins to sputter. Small panko-like bits will fall to the bottom, keep cooking and stirring while those bits turn brown. The butter will smell nutty and it will stop sputtering, going silent as all of the water has evaporated and the milk solids have turned a toasty brown color. Pour into a bowl, scraping up all the brown bits from the pan, and let cool.
- Divide the butter: set 113g of the butter (a mix of liquid and brown bits) aside for the filling, 57g (mostly the liquid) for the dough and reserve 1-2 tablespoons of mostly the brown bits for the glaze.
- Make the dough: pour the warm water (60g or ¼ cup) into the bowl of a stand mixer. Sprinkle the yeast (2 ¼ teaspoons or 7g) over the water then add a pinch of the sugar. Gently whisk then set aside for a few minutes: it should foam to indicate it’s fresh and good to use. Add the flour on top (520g or 4 cups), along with the pumpkin puree (190g or ¾ cup), greek yogurt (120g or ½ cup), vanilla (1-2 tsp), salt (½ tsp) and the rest of the sugar (100g or ½ cup). Affix the dough hook attachment and begin to knead on low, working up to medium speed. Once the dough starts to come together, pour in the browned butter reserved for the dough (57g or ¼ cup). Knead on medium speed until the dough clears the bowl and forms a lump around the hook. Transfer the dough to the counter and knead by hand for a few minutes, until supple. Transfer to an oiled bowl and cover with plastic wrap to seal.
- First rise: leave the dough at room temperature until roughly doubled in size, 2-3 hours depending on the temperature of the kitchen. If you are letting the dough rise overnight, it should only increase by 50% before placing in the fridge (about 1-2 hours at room temperature).
- Fill the dough: On a well floured countertop, roll the dough out to a large rectangle that’s about 14 inches x 12 inches. Spread the cooled (it should be at a creamy consistency, cooled but not solid) browned butter reserved for the filling over the dough (113g or ½ cup). In a separate bowl, mix together the brown sugar (150g or ¾ cup) with the pumpkin spice (1-2 tablespoons) and the fine sea salt (¼ tsp). Sprinkle this mix over the butter, spreading with an offset spatula or your hand into an even layer. Roll up the dough so you have a long rope then slice it using a bread knife, into 10-12 rolls (depending how large you want them).
- Second rise: oil or butter a 13 x 9 inch cake pan and arrange the unbaked rolls in the pan so they have enough room to spread and rise; about half an inch of space around each. Cover the pan with the plastic wrap or a tea towel and let rise at room temperature until puffy and when pressed, the dough leaves an indentation - about 1-2 hours (longer if the dough was in the fridge overnight).
- Bathe and bake: Preheat the oven to 350 F. Pour the heavy cream (120g or ½ cup)around and in the space between the rolls. Tilt the pan so the heavy cream covers the pan where it is visible. Bake the rolls until golden brown, about 25-35 minutes. You can check for doneness by using an instant read thermometer, inserted into the middle of the middle roll it should reach 190 F.
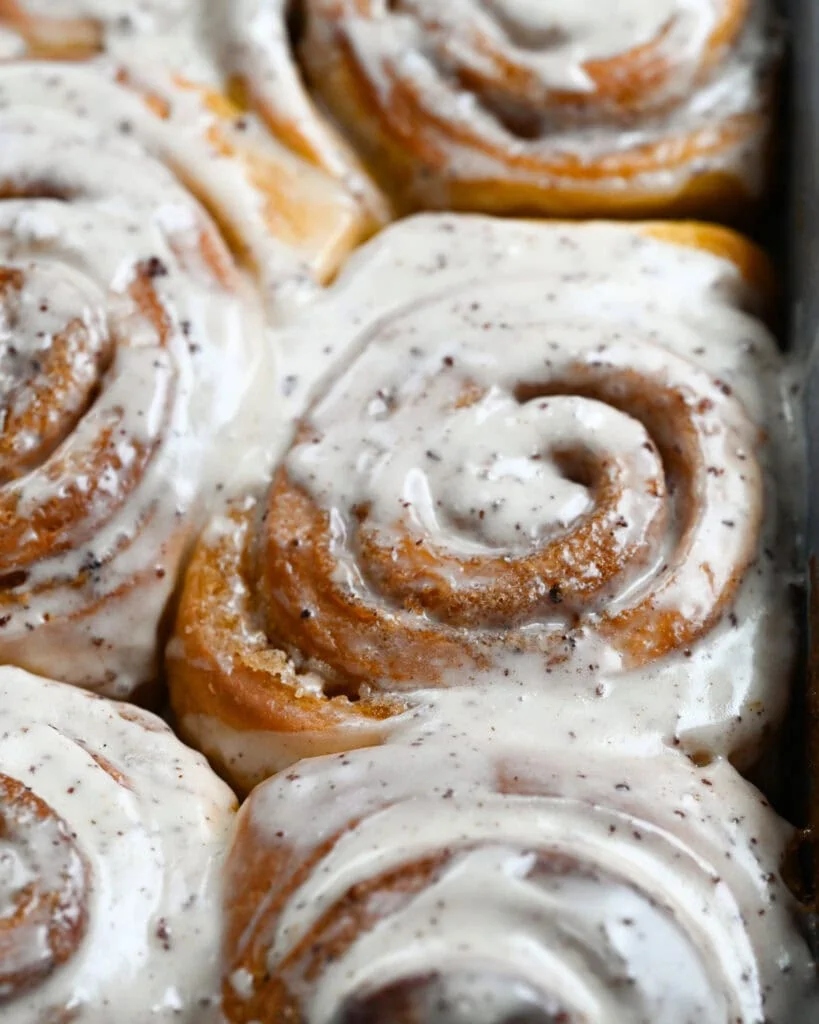
- Top the rolls: in a bowl, whisk together the reserved brown butter bits (1-2 tablespoons), the powdered sugar (190g or 1 ½ cups), vanilla (1-2 teaspoons), a pinch of salt, heavy cream or milk (2-4 tablespoons). Add the cream cheese if using. Whisk until the glaze is smooth; thick but spreadable. Spread the glaze over the rolls: if you like it to melt all over the rolls do this while they are still warm. If you prefer a thicker topping that stays separate from the bottom rolls, wait until they are completely cool then spread the glaze.
Did you make this recipe?
Share & tag me on instagram @buttermilkbysam


