How To Properly Brown Butter
Learn how to brown butter like a pro: knowing what each stage of the process means, what to notice using your senses.
I have around 40 recipes that have brown butter, I love it so much. Years ago someone asked me to show them ‘how to actually brown butter’. I have thought about that request on and off and filmed extensive videos of butter browning though I hadn’t put a practical, detailed guide together – until now.
What is brown butter?
Butter is a little under 20% water and just over 80% fat. The rest is tiny amounts of milk solids (proteins and sugar). When browning, the water fully evaporates; the water has to evaporate so that the milk solids can undergo the maillard reaction, when the proteins and sugars are transformed by the heat. It’s the same reaction that happens when the edges of your cookies/the outside of the cake/ the crust of bread turn brown. It’s what makes those bits so much more tasty.
Often in my recipes you’ll see the step written out like this:
In a light colored skillet over medium-low heat, melt the butter, stirring the pan frequently. When it smells nutty and most of the bits turn a toasty brown, it’s done. Immediately remove from the heat so the milk solids do not burn.
Let’s walk through this in detail to understand what is happening, why and what to look/listen for and even smell.
But first note: we want the heat medium to get us through the browning process but not too quickly and without creating hot spots. The light colored pan is so that we can see what’s happening in the pan (specifically the color of those milk solids). You’ll stir frequently so that it browns evenly.
Process of Browning Butter
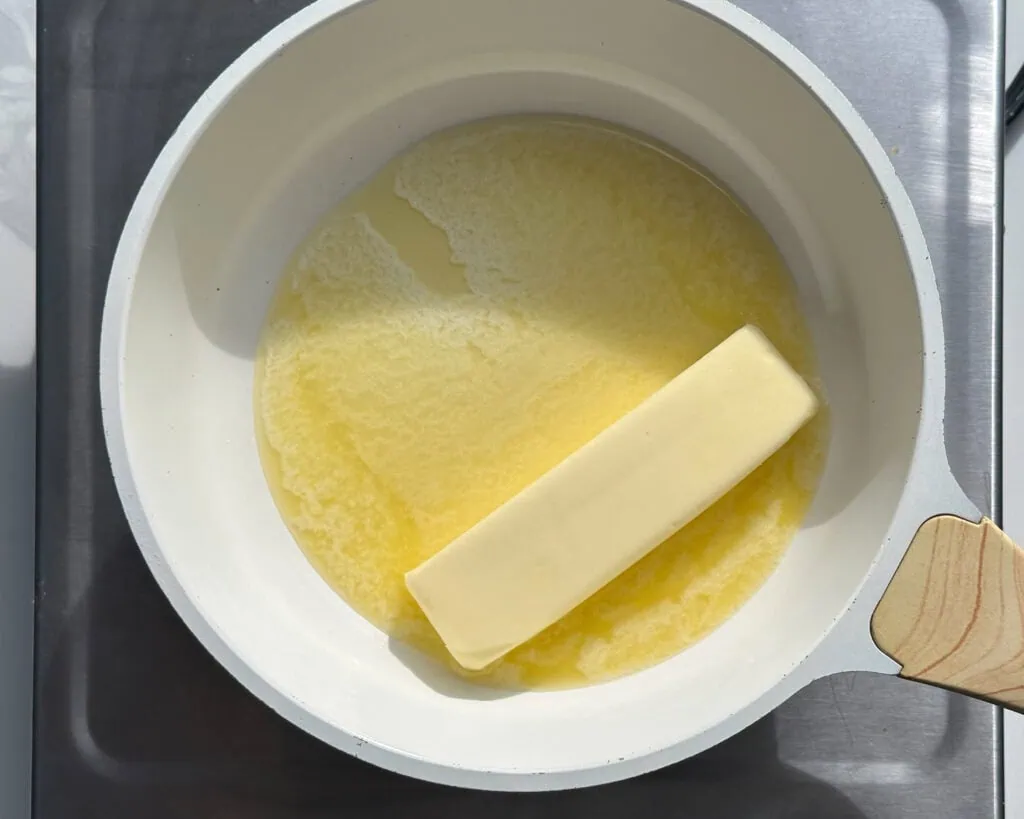
1. Melting:
Hear: hopefully nothing, if you are hearing something before the butter has fully melted then the heat is too high, and some of it is further through the process and it will brown unevenly.
See: solid turning to liquid.
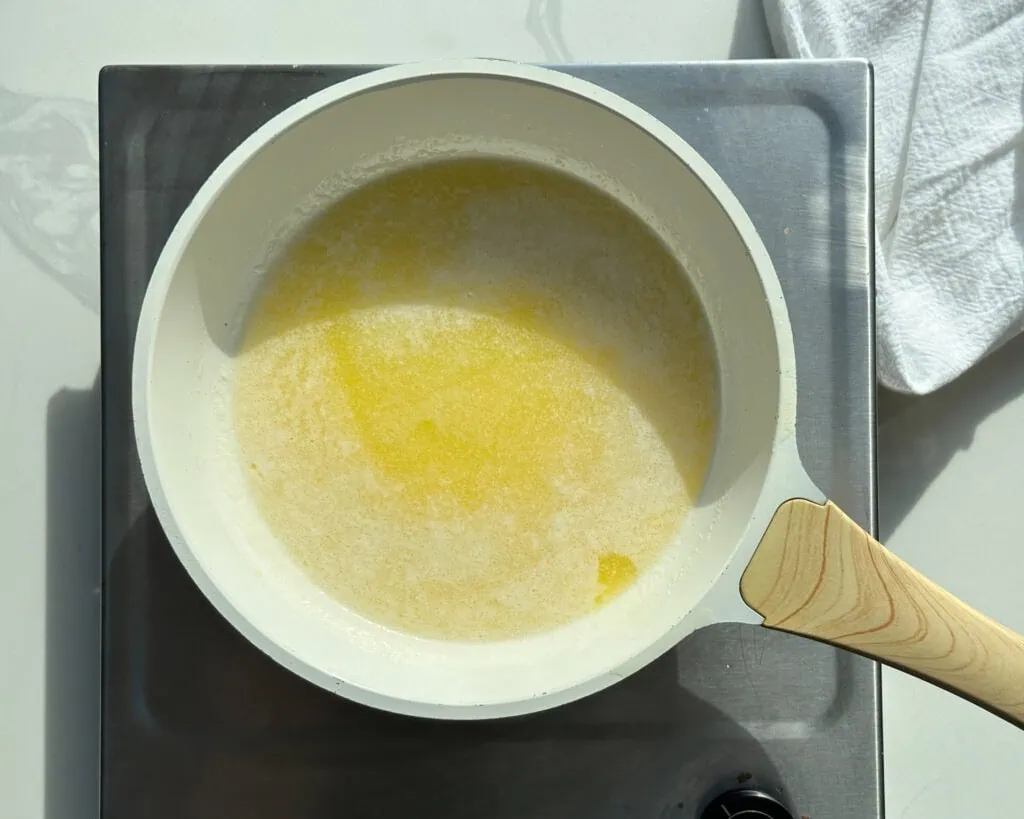
2. Sputtering: the water is evaporating.
Hear: POP CRACK POP; loud sputtering/bubbling/crackling.
See: big bubbles emerging out of the yellow liquid and popping. They will sputter up and sometimes out of the pan. If it’s too aggressive, turn the heat down.
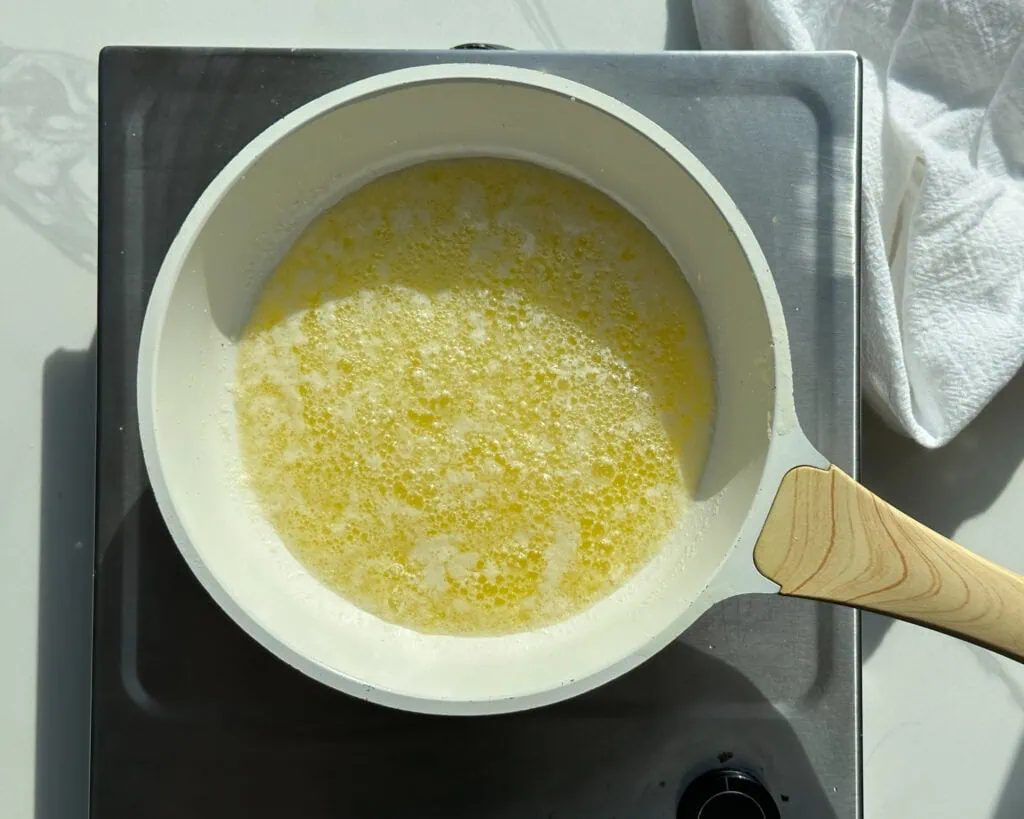
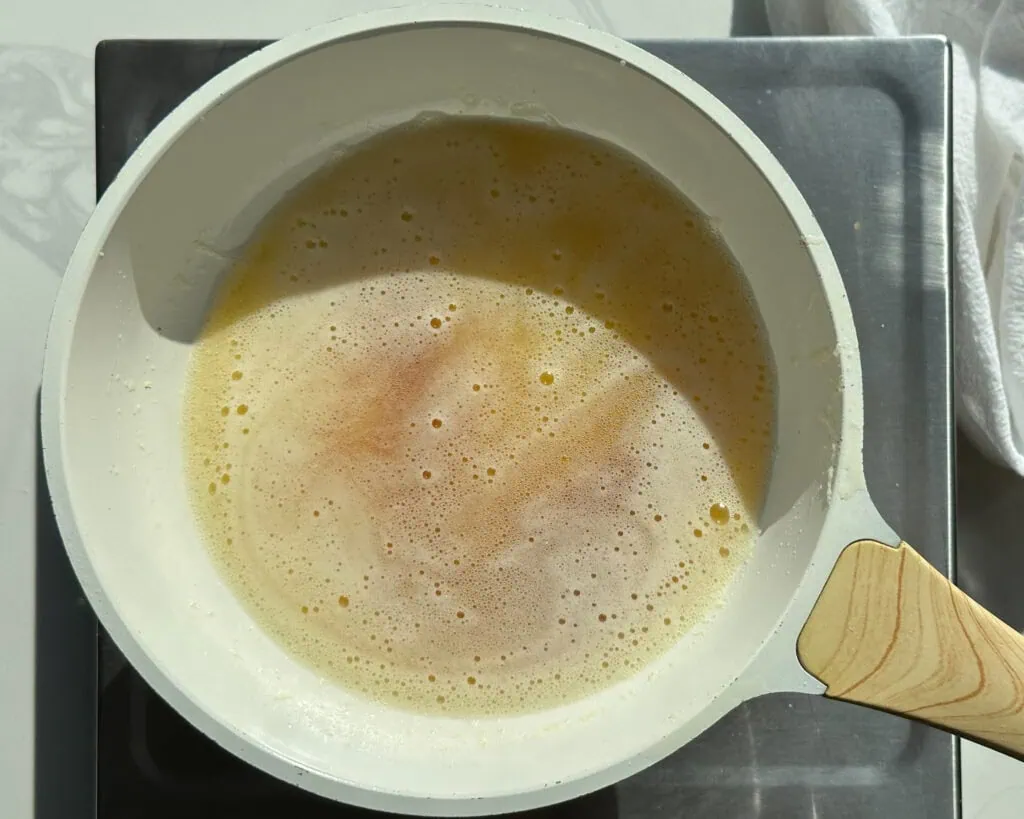
3. Foaming: the milk solids are separating from the liquid.
Hear: pfffffffffff; like sound a bath bomb makes when it floats up to the top of the water and fizzles.
See: “foam”, a thick layer of tiny white bubbles that cover the yellow liquid below. If you swirl the butter or stir it, you’ll see little milk colored bits that look like panko, sinking to the bottom. You will likely also see some of those bits starting to change color.
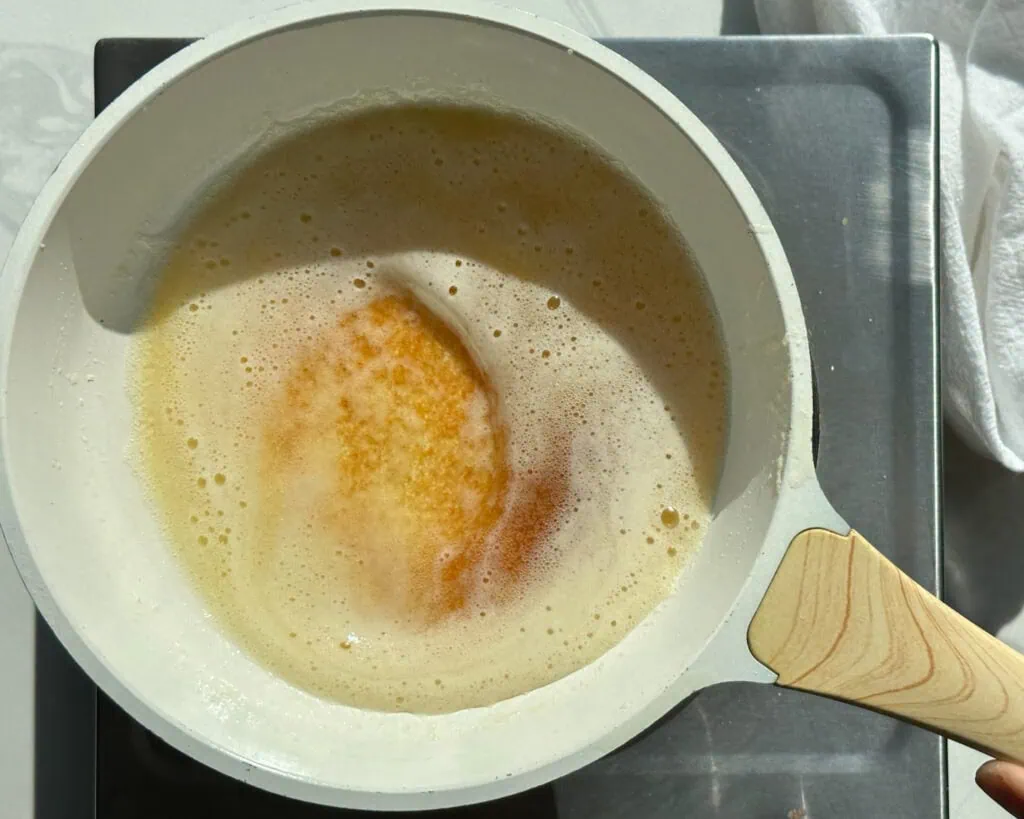
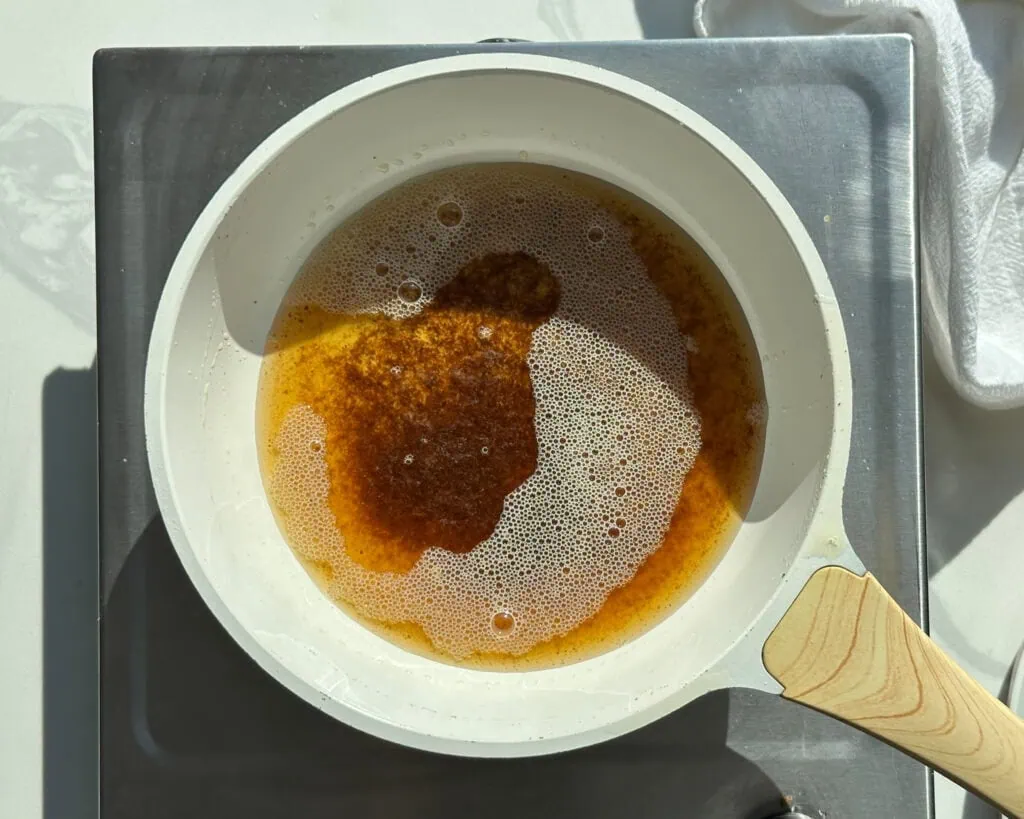
4. Browning: milk solids are undergoing the maillard reaction.
Hear: mostly quiet.
See: the milk solids are a warm brown, like bread after it’s toasted.
Smell: nutty/caramel like scent.
→ the foaming and browning often happen concurrently, but the solids will continue to brown after the foaming stops.
→ when you are at the point where the water is gone, you can separate the milk solids (they are golden but not deep brown), and you can strain them out…. the remaining liquid is called ghee or clarified butter.
How do I know when butter is done browning?
This is an important question because when you stop can impact the final bake. Don’t stop until all the milk solids have turned deep brown. We don’t want half of the milk solids cream colored and half deep brown, there is still browning to be done. We also don’t want the bits to be a creamy colored brown, it should be like well toasted bread. See below:

Once it looks like this, it’s done and needs to be fully removed (get every little brown bit!) from the heat or it will continue to cook and then burn. Those bits can turn black in seconds.
Troubleshooting
If some of the milk solids are changing color much faster than others, the heat is too high. Reduce it and stir/swirl more often so that they brown altogether and evenly.
If the milk solids turn black: it’s burnt. Start again.
If you didn’t go far enough and you see your solids look like a medium brown after you’ve taken it off, try putting it back on the heat to continue browning.
Brown butter ≠ butter
→ Often we start with one stick of butter or 113g. After browning it will weigh 90-92g; that loss is the water that evaporated. However, you can’t simply add water to bring it back to 113g and treat it like it’s regular butter. The composition of the butter has changed in the browning process. I find adding cream or yogurt helps bring it closer to its original form.
Browning butter, in photos: